Pages

Wednesday, June 27, 2012

23

Add Post titles to Older and Newer Post links – reloaded

When viewing a single Blogger blog post there are links to Newer Post, Home, and Older Post at the bottom of the page. Unfortunately the Newer and Older post links only contain text "Newer Post" and "Older Post", not the actual post titles. Wordpress, from where I migrated to Blogger, can display the post titles. But not Blogger...

Previous hacks

There are already some hacks to do this. One of the first is by ETBlue, here's that hack. It works very well, but it skews the stats: the loading of two extra posts by jQuery results in two extra stats hits for an opened post.

I did a hack, too, which adresses the stats problem, it is here. It uses somewhat different method to get the post titles: they are fetched from the blog feed, or generated from the blog url (=pseudo title), so no extra posts are loaded, so we have no stats skew. The problem is that is only gets real titles for 500 latest posts. Older posts get a pseudo title. 500 is sufficient in most cases. The script could be modified to get 1000 posts, or more, but it would take some time to load the feeds.

In a comment of my previous hack Duy Pham gave a link to his Older/Newer post title hack. He has an excellent solution for getting the titles from the blog feed: first get the index using publishing date of the post, then retrieve maximum of 3 posts (previous, this post and next post) from a feed.

Duy Pham's hack was so inspiring, that I started coding the thing same in jQuery (Duy uses javascript), and to be compatible with my previous hack. The result has 2 lines less code than the previous hack, and many more features:

Post titles to Older and Newer Post links – reloaded


Installing the hack

You need to edit your blog's template. I use jQuery in this hack, so you need jQuery. Check your template, and if it does not have jQuery, insert this before </head:>
<script src='http://code.jquery.com/jquery-latest.js' type='text/javascript'></script>

Then find </body> and insert this code (just) before it:


If you had the previous version installed, you can replace the old code. Save the template, and the hack is installed!

Configuration

You can configure the following javascript variables:

olderLink - contains the template for older link, you can use [title] in this
newerLink - template for newer link, you can use [title] in this
olderTitle - template for older link title, you can use [title], [date] and [datetime] in this
newerTitle - template for newer link title, you can use [title], [date] and [datetime] in this

You can use any html, too, for example you can use images. If you use the default olderLink and newerLink, you can also style classes .blog-pager-older-link-title and .blog-pager-older-link-title.

The previous/next links need some styling, so that post titles fit better. For example something like this in Simple template; add these to the styles section of your template (or use Template Designer|Advanced|Add CSS):
.blog-pager-newer-link {background-color:transparent !important;padding: 0 !important;}
.blog-pager-older-link {background-color:transparent !important;padding: 0 !important;}
#blog-pager-newer-link {padding:5px;font-size:90%;width:200px;text-align:left;}
#blog-pager-older-link {padding:5px;font-size:90%;width:200px;text-align:right;}
.home-link {left:0px;position:absolute;margin-left:250px;text-align:center;width:60px;white-space:nowrap;}
If you don't have Simple template, test and change styles if needed. Values for .home-link work with 560px wide text area (250x2+60=560), change accordingly if needed. If "Home" text is very wide in your language, you may also have to change the values (test and see if it works). Of course you can style everything quite differently than me, that's just CSS. :)

Hope you like this hack!

Monday, June 11, 2012

3

Contact Form added

I added a new page containing a contact form to this blog. I use EmailMeForm service, which I already have used before in another blog of mine. EmailMeForm is free up to 200 form submissions per month and up to 5 different forms.


Link to the contact form can be found below the header, at the moment there are links to Home (main page) and Contact form.

Friday, June 8, 2012

3

Small update to Adding Post titles to Older and Newer Post links

Since Blogger has started rolling out local domains, depending where you view the blog, the links inside the blog may not be anymore blogname.blogspot.com/ but may be for example blogname.blogspot.co.uk/ or blogname.blogspot.fi/.

However, the urls are internally still blogspot.com and also in blog's feeds. My hack for Adding post titles to Older and Newer Post links fetches the posts' urls and titles from feed and tries to change the older/newer post links' texts to post titles using the url. Local domains disturbed this, no match was found and a pseudo title was generated instead.

So I had to make a small update that changes the local domain back to .com before matching it with feed urls. Lines 34 and 41 are new, both containing this same code:
href = href.replace(/\.blogspot\.[^/]+\//, ".blogspot.com/");
If you have this hack installed, I suggest you make the same update. See the whole hack with installation instructions here, source code updated: Add post titles to Older and Newer Post links.

Update June 27th 2012: new version of this hack is here, I suggest you consider using it instead of this.

Thursday, June 7, 2012

20

Round avatars, thumbnails, and other images

Lately I learned how images can be rounded using CSS. This seems to be a "good formula":
.someclass {
-webkit-border-radius: 100px;
-moz-border-radius: 100px;
border-radius: 100px;
-webkit-box-shadow: 0 1px 3px rgba(0, 0, 0, .4);
-moz-box-shadow: 0 1px 3px rgba(0, 0, 0, .4);
box-shadow: 0 1px 3px rgba(0, 0, 0, .4);
}
For some templates, and maybe just for a change, those rounded images can look very good. I'll show you CSS you can add to my hacks, and one Blogger gadget, to make images round. In my hacks you should add the CSS in the code before </style>.

Better recent comments gadget

Add this style:
.recent-comment-ico img {
-webkit-border-radius: 100px;
-moz-border-radius: 100px;
border-radius: 100px;
-webkit-box-shadow: 0 1px 3px rgba(0, 0, 0, .4);
-moz-box-shadow: 0 1px 3px rgba(0, 0, 0, .4);
box-shadow: 0 1px 3px rgba(0, 0, 0, .4);
}


Profile gadget with post count

Add this style:
.author-avatar {
-webkit-border-radius: 100px;
-moz-border-radius: 100px;
border-radius: 100px;
-webkit-box-shadow: 0 1px 3px rgba(0, 0, 0, .4);
-moz-box-shadow: 0 1px 3px rgba(0, 0, 0, .4);
box-shadow: 0 1px 3px rgba(0, 0, 0, .4);
}


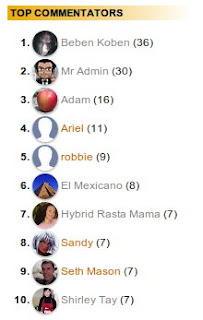
Top Commentators gadget

Add this style:
.top-commenter-line img {
-webkit-border-radius: 100px;
-moz-border-radius: 100px;
border-radius: 100px;
-webkit-box-shadow: 0 1px 3px rgba(0, 0, 0, .4);
-moz-box-shadow: 0 1px 3px rgba(0, 0, 0, .4);
box-shadow: 0 1px 3px rgba(0, 0, 0, .4);
}


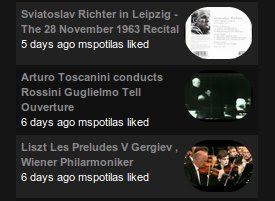
Gadget for YouTube activity feed

This gives a nice "tube TV" like effect, add this style:
div.ytc_thumb img {
border:none;
-webkit-border-radius: 100px;
-moz-border-radius: 100px;
border-radius: 100px;
-webkit-box-shadow: 0 1px 3px rgba(0, 0, 0, .4);
-moz-box-shadow: 0 1px 3px rgba(0, 0, 0, .4);
box-shadow: 0 1px 3px rgba(0, 0, 0, .4);
}


Just one more, and I think you'll get the hang of it. :)

Popular Posts (Blogger gadget)

Add this style using Template Designer, Advanced, Add CSS:
.PopularPosts .item-thumbnail img {
-webkit-border-radius: 100px;
-moz-border-radius: 100px;
border-radius: 100px;
-webkit-box-shadow: 0 1px 3px rgba(0, 0, 0, .4);
-moz-box-shadow: 0 1px 3px rgba(0, 0, 0, .4);
box-shadow: 0 1px 3px rgba(0, 0, 0, .4);
}


Wednesday, June 6, 2012

17

Profile Gadget with avatars and post counts

This is especially for multi author blogs. In multi author blog the profile gadget is very simple looking. It only contains author names in <ul>/<li> list. There is "avatar" but that is the default blogger logo.


My multi author blog profile gadget looks like this:


It works on single author blogs, too, and one could customize it to look about the same as the default single author blog profile gadget, but I'll leave that for you as an exercise. :)

Installation is simple. Add HTML/Javascript gadget into your blog, and paste the following code there:


You can configure some things in the script: maximum user name length, author line template, avatar size, and is avatar cropped or streched. As always, you can also modify the CSS to your liking.

This was "thrown together" very quickly, but it works ok so I decided to publish it. Hope you like it.

12

Customizable Author Box with post count

I got this request for an author box with post count in my blog's comments. An author box is something that is displayed after a post, and it shows info about the author who wrote the post. WordPress.org has many author box extensions, for example Author Box After Posts. There are some hacks for Blogspot blogs, too, but they are generally for single author blogs, and with no post count.

My Author Box has support for blogs with multiple authors, and post counts per author.


I must warn you, this hack suits best people who can do their own template customizations and basically already know their way around. These instructions have worked "as is" for Simple and Awesome templates, should work for all others, too, especially if you know you to adapt the code. Not for dynamic templates, though.

How to install

Installing is quite simple. Edit template HTML, expand widget templates. This hack uses jQuery, so if your template does not already have jQuery, add the following code in your template before </head>:
<script src='http://code.jquery.com/jquery-latest.js' type='text/javascript'></script>

Then find: <data:post.jumpText/>, there should be only one instance. Few lines down from there is line:
<div class='post-footer'>
just before that line paste all this code:


This (+ possibly jQuery loading) is the only code you need to put into the template. Later I'll show you three snippets from this same code, don't put them in the template, just edit the previous code at those points. After pasteing the code to the template, you can save the template and see if there were any errors. You can also test the hack at this time. After that you must customize the hack to suit your blog and blog's authors.

Configuration

This hack works for both single author and multi author blogs. If you have multi author blog, you must set var multiAuthor = true; This setting can be true for single author blogs, too, but it is sligthly faster if you put false there for single user blogs.

With onePost and manyPosts variables you can localize the words "post"/"posts" or use other word like "article"/"articles".

There are more configurable things in javascript parts, but I'll tell more about them later.

HTML markup

This part defines the look of author box.


Author box html comes partly from the template, and author specific thigs are set by javascript. If you have a single author blog, you can put basically any html between <div class='post-author-block'> and </div>.

Just use <span class='authorinfopostcount'>0</span> where you want the post count to appear, and <span class='authorinfopostpost'>posts</span> where you want the singular/pluralis post word to appear. You can also use the same classes as in multiple author blogs, and you can use additional classes and make CSS for them as you wish.

With multi author blog, author specific information contains post count, author (profile) link, author avatar image, author description, and author name. So these can not be "hard coded" into the box, but they are set via javascript. Inside <div class='post-author-block'> and </div>, when you use the following tags + classes, their contents will be dynamically set:

<a class='authorinfolink'>somemarkup</a> this will link the text "somemarkup" to author profile link
<img class='authorinfoimage' src=''/> this will get author avatar
<span class='authorinfoname'/></a> author name will be put inside this span
<span class='authorinfopostcount'>0</span> and post count here
<span class='authorinfopostpost'>posts</span> this will be post/posts (singular, pluralis) according to how many posts author has
<span class='authorinfodescription'></span> this will be replaced by the author specific description, which can be plain text or complex html (but no scripts). Class can be used in div, too.

You can also add classes and CSS for elements if you wish. It is just basic template editing. And probably want to customize the CSS too, to get the box look like you want. CSS part is this:


Then in the javascript part, for every author or the blog you should set variable aut_desc['AUTHORNAME']. Element with class='authorinfodescription' will receive that description. You can use html here, put div's there, br's, links, imgs, pretty much everything, but not scripts. Now there is only some info about me and some dummy info, you can replace them with content that is relevant to your blog.

For every author or the blog you can (but it is not necessary) set/override auth_url['AUTHORNAME']. This way you can link author straight to his Google+ profile, or any other page you wish, instead of the blogger profile page. Here's the configuration part of the javascript:


I would have liked to get the author description automatically, but there is no feasible way of getting author profile descriptions in multi author blog, so the descriptions must be set in script. Positive side is that you can use any description you want, with links, images etc. Because descriptions could not be fetched automatically, I decided to leave the whole hack simple, so its users can customize the author box look themselves.

If anyone wants to develop this idea further, go right ahead. I'm not so good at making html/css, some of you will make this look much better. If you use it, please drop a comment so I can see what it looks like in your blog. :)

8

Hack for my recent comments hack: don't show own comments

Maybe you don't want to show your own comments in recent comments? Here is quick and simple hack for my Son of the better recent comments gadget to make it not show own comments.

Edit the HTML/Javascript gadget. Change lines 93 and 115, which both look like this now:
var entry = json.feed.entry[i];
to:
var entry = json.feed.entry[i]; if(entry.author[0].name.$t=="PUT YOUR USERNAME HERE") continue;
Edit your username inside the quotation marks. Save the gadget. Your comments won't be displayed anymore in recent comments.
See the hack
for this dynamic
views icon: